
How to Size an O-Ring: The Easiest Tools and Methods
Guessing a size costs you time, freight, and a leaking seal. Here's how to measure any o-ring correctly the first time, using tools you probably already have — plus a couple worth buying.
By the Mr O-Ring Team · O-Rings
Every o-ring is defined by three numbers: inside diameter (ID), outside diameter (OD), and cross section (CS), sometimes called width. Get any one of those wrong and the ring either won't seat in the groove or won't seal under pressure. The good news is that sizing an O-ring correctly doesn't require a machine shop — just the right tool and a consistent method.
Quick rule: you only ever need two of the three measurements. ID + CS gets you the OD, and OD + CS gets you the ID. Cross section is almost always the easiest one to measure accurately, so start there.
Step 1: Measure the Cross Section First
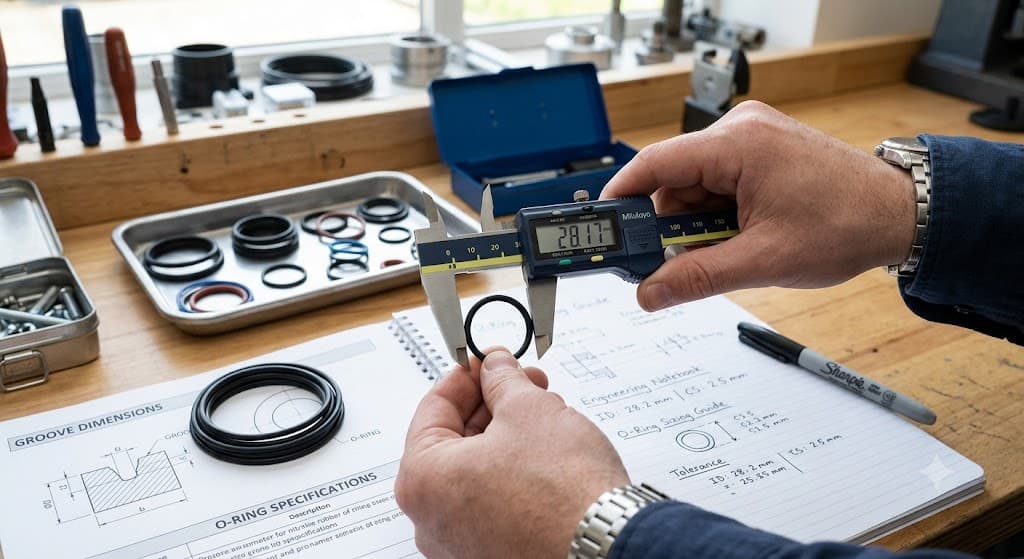
Cross section is the thickness of the rubber itself — the diameter of the "tube" that forms the ring, not the diameter of the ring as a whole. Lay the O-ring flat, or better, cut a sample ring in half, and measure straight across the thickest part. Calipers are the fastest way to do this accurately.
Step 2: Measure the Inside Diameter
With the ring relaxed (not stretched) on a flat surface, measure straight across the inside opening at its widest point. If the ring is old or slightly deformed, take two or three measurements at different angles and average them — O-rings that have been compressed in a groove for years often measure slightly oval.
Once you have ID and CS, you can check your work against the outside diameter:OD = ID + (2 × CS)
The Tools That Make This Easy
You don't need all of these — pick the one that matches how often you size O-rings and how much precision the application demands.
1. Digital or Dial Calipers
The most versatile option on this list. Open the jaws around the cross section for a direct CS reading, then span the inside opening for ID. Digital calipers read straight to the thousandth of an inch or hundredth of a millimeter, so there's no interpreting hash marks.
Best for: one-off measurements and shop use
2. O-Ring Sizing Cone
A tapered cone marked with dash-number steps. Slip the ring over the cone and slide it down until it stops — the step tells you the dash number directly, no math required. Most cones cover the standard AS568 cross sections (.070", .103", .139", .210", .275"), so you'll also need to check the ring's cross section against the correct slot on the cone first.
Best for: quickly identifying standard AS568 sizes
3. Flip Chart / Silhouette Size Chart
A laminated chart with the actual outlines of common o-ring sizes printed at true scale. Lay the ring directly on top of the chart and match it to the printed silhouette — no measuring at all, just visual comparison. Fast, but only useful if the ring is a standard size already represented on the chart.
Best for: fast visual matching against standard sizes
4. O-Ring Sizing Tape (O-Sizer Tape)
A flexible tape you wrap around the inside of the ring to read ID directly, without stretching the rubber the way a rigid caliper jaw can. Handy for larger rings where calipers run out of reach.
Best for: larger diameter rings, in the field
5. Pi Tape
A precision tape calibrated in diameter (not circumference) that wraps around the ring and reads the ID directly, down to the thousandth of an inch. This is the tool to reach for when a standard tape or caliper reading isn't tight enough for the tolerance you need.
Best for: high-precision or critical sealing applications
6. Slide Gauge
A simple sliding gauge built specifically for O-ring cross sections. Squeeze the ring's cross section between the jaws and read the scale — quicker to use one-handed than a full caliper when you're sizing a lot of rings back to back.
Best for: high-volume sizing, standard cross sections
No Tools on Hand? Try the String Method
In a pinch, wrap a piece of non-stretch string or thread snugly around the inside opening of the ring, mark where it overlaps, then measure that length flat against a ruler and divide by pi (3.14159) to estimate the ID. It's not precision-grade, but it'll get you close enough to narrow down which dash number to order.
Match Your Measurements to a Dash Number
Once you have ID and CS, cross-reference them against a standard size chart — AS568 for inch sizes, or the appropriate metric standard (ISO 3601, JIS B 2401, DIN 3771, etc.) if the part came from metric equipment. A quick reference for the most common AS568 cross sections:
Cross Section (CS) Approx. Inches Common Use
100 series 0.070" Small fittings, connectors
200 series 0.103" General industrial
300 series 0.139" Hydraulic, pneumatic
400 series 0.210" Larger bore fittings
500 series 0.275" Heavy-duty, large diameter
A Few Things That Throw Off a Measurement
Stretching the ring while measuring ID — always measure relaxed, never pulled taut.
Compression set on an old ring pulled from a groove — it may read oval or undersized. Measure at a few points and average.
Swelled rubber from chemical or heat exposure — a ring that's been in service may have swollen slightly larger than its original spec.
Reading OD instead of ID by accident — always confirm which diameter your tool is actually contacting.